Integrating the Crayon Design 2 Last Brush into Your Procreate Workflow
In the digital design landscape, texture is often the differentiator between a sterile, computer-generated image and a piece that feels human, tactile, and authentic. For professionals ranging from graphic designers to wedding stationers, the Procreate Brush - Crayon Design 2 Last offers a specific solution to this challenge. It is not merely a tool for sketching; it is a specialized asset designed to inject organic warmth into modern calligraphy, lettering, and branding projects. Understanding how to integrate this brush into your broader creative process requires more than just downloading a file. It demands an understanding of where textured elements fit within a professional workflow, how they interact with other digital assets, and how to maintain consistency across various deliverables.
The Role of Texture in Modern Digital Lettering
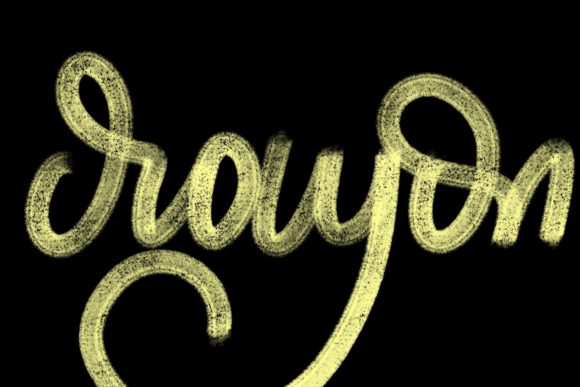
Digital lettering and modern calligraphy have evolved significantly over the last decade. While vector-based tools like Adobe Illustrator offer precision and scalability, they often lack the subtle imperfections that make hand-lettered work feel approachable and elegant. This is where the Crayon Design 2 Last brush becomes a critical component of your toolkit. Designed specifically for Procreate 5 and above, this brush mimics the granular, slightly uneven deposit of wax on paper. When applied to lettering, it breaks up the perfect curves of digital strokes, adding a layer of visual interest that captures the eye.
For entrepreneurs and small business owners, this distinction matters. A logo or greeting card that feels handmade can convey values of craftsmanship, care, and authenticity. However, achieving this look consistently requires a deliberate approach. You cannot simply rely on the brush alone; you must understand how its pressure sensitivity interacts with your Apple Pencil to create varying levels of opacity and texture density. This level of control allows you to jazz up your workspace outputs, whether you are designing social media graphics, quote designs, or high-end wedding stationary.
Preparation and Technical Compatibility
Before integrating any new asset into your workflow, technical compatibility must be established. The Procreate Brush - Crayon Design 2 Last is engineered with specific hardware requirements in mind. It is crucial to note that this brush is only suitable for the Procreate app on iPad Pro devices equipped with a compatible, pressure-sensitive stylus such as the Apple Pencil. This is not a limitation but a feature of its design. The brush relies on the nuanced pressure data provided by the Apple Pencil to simulate the physical resistance and friction of crayon on paper.
Attempting to use this brush on non-pressure-sensitive devices, or trying to import it into software like Photoshop or other computer-based applications, will result in a subpar experience. The algorithm behind the brush expects the dynamic input range of the iPad Pro ecosystem. Therefore, part of your implementation strategy involves ensuring your hardware is up to date. If you are a freelancer working across multiple devices, you must designate your iPad Pro as your primary texturing station. This segmentation of tasks—using desktop software for layout and vector work, and the iPad for textured lettering—creates a more efficient hybrid workflow.
Workflow Integration: From Concept to Final Asset
Integrating the Crayon brush into a project typically happens during the refinement phase, though it can also drive initial concepting. Consider a typical workflow for creating a custom quote design for a client. The process might begin with rough sketches using standard pencil brushes to establish composition and hierarchy. Once the structure is solid, you switch to the Crayon Design 2 Last brush to execute the final letterforms. This transition allows you to maintain structural integrity while applying the desired aesthetic finish.
Here is how you can structure this phase for maximum efficiency:
- Layer Management: Always create your textured lettering on a separate layer above your base sketch. This non-destructive approach allows you to adjust opacity, blending modes, or even erase specific sections without affecting the underlying structure.
- Pressure Calibration: Spend five minutes calibrating your Apple Pencil settings within Procreate before starting a major project. Test the brush at different pressures to understand how light touches create faint, grainy lines versus how heavy pressure creates bold, saturated strokes.
- Color Selection: Crayon textures interact differently with various colors. Darker, richer tones often highlight the grain better than pastels. Experiment with your brand palette early in the process to ensure the texture remains visible and effective.
For marketers and bloggers, this workflow extends to content creation. When designing headers for blog posts or social media cards, using a consistent textured brush helps establish brand recognition. By making the Procreate Brush - Crayon Design 2 Last a standard part of your visual identity kit, you ensure that all your graphical outputs share a cohesive, handcrafted feel.
Enhancing Specific Deliverables
The versatility of this brush set allows it to serve multiple functions across different types of projects. For wedding stationary designers, elegance is paramount. The crayon texture adds a soft, romantic quality to monograms and invitation headers that stark, digital fonts cannot replicate. When creating logos, particularly for brands in the artisanal, organic, or lifestyle sectors, this brush can be used to draft initial concepts that are later refined. Even if the final logo is vectorized, the textured draft serves as an essential reference for maintaining the organic spirit of the design.
Educators and publishers can also leverage this tool for creating engaging worksheets or book covers. The hand-drawn aesthetic makes educational materials feel less intimidating and more approachable for students. By incorporating quote designs created with this brush, you can break up text-heavy layouts and provide visual anchors that guide the reader’s eye.
Maintaining Consistency and Quality Control
One of the challenges of using textured, hand-drawn brushes is maintaining consistency across multiple pieces. Unlike a standard font, every stroke is unique. To mitigate this variability and ensure professional quality control, consider the following practices:
- Create Custom Swatches: Save your most frequently used color combinations as swatches in Procreate. This ensures that the texture appears consistent in hue and saturation across different projects.
- Standardize Canvas Sizes: Working on canvases with similar resolutions helps maintain the scale of the texture. A brush stroke that looks perfectly grainy on a 3000x3000 pixel canvas may look too coarse or too fine on a significantly larger or smaller file.
- Document Your Settings: If you adjust the brush settings (such as size, opacity, or flow) to achieve a specific look, document these changes. This allows you to replicate the effect in future sessions, reducing the time spent on trial and error.
Furthermore, remember that this brush is part of a larger ecosystem. It works best when combined with clean, sans-serif fonts for body text or when paired with smooth digital backgrounds. The contrast between the rough crayon texture and clean digital elements creates a balanced, modern aesthetic that appeals to contemporary audiences.
Long-Term Value and Skill Development
Investing time in mastering the Procreate Brush - Crayon Design 2 Last yields long-term benefits for your creative career. As you become more proficient with pressure sensitivity and texture application, your speed and confidence increase. What initially takes hours of tweaking can eventually be executed in minutes. This efficiency is crucial for freelancers and small business owners who need to balance high-quality output with tight deadlines.
Moreover, developing a signature style using specific tools like this brush can become a unique selling proposition. Clients often seek out designers who have a distinct visual voice. By consistently delivering work that features elegant, textured lettering, you position yourself as an expert in modern calligraphy and hand-drawn design. This specialization can open doors to higher-value projects in branding, publishing, and bespoke stationery design.
In conclusion, the Crayon Design 2 Last is more than a digital imitation of a physical tool; it is a strategic asset for anyone looking to add humanity and warmth to their digital workflows. By understanding its technical requirements, integrating it thoughtfully into your production pipeline, and maintaining rigorous quality control, you can elevate your designs from functional to exceptional. Whether you are creating a simple greeting card or a complex brand identity, this brush provides the tactile connection that resonates with audiences in an increasingly digital world.